
I’ve recently set about building a new powerful machine for myself, with a firm intent to overclock it for 24/7 use. So, while being powerful, it would also need to run reasonably cool. The ingredients were:
- Intel Core i7 3930K, 6-core Hyperthreaded CPU, rated at 3.2GHz
- Asus P9X79 motherboard (as I really needed that PCI slot for a legacy card)
- Intel® High Performance Liquid Cooling system (which is based on Asetek 510LC)
- Corsair Carbide 400R
- Arctic Silver 5 thermal compound
- A few extra fans
The copper plate of the cooling system was lapped to complete flatness, using wet sandpapering with corn size of 320, 600 and finally 1000. Everything was mounted with a minute amount of Arctic Silver 5 so as not to degrade thermal conductivity. I also set up a push-pull fan system around the radiator to more efficiently dispose of the excess hot air.
After the thermal compound went through its curing period and the core and socket temperatures stabilised, I started overclocking the system, while running Prime95 for load and System Information for Windows (SIW) for monitoring. SIW gives more information, than CoreTemp. More specifically, you get to see the package and socket temperatures.
I hit the heat limit for 24/7 usage at 3.8GHz. The cores were running at about 73C, while the socket temperature kept at 64C with the ambient room temperature of 24C. And here comes the interesting part…
The socket backplate is well exposed in the Carbide 400R case, thanks to the big window in the motherboard mounting plate.

The backplate was impossibly hot to the touch – 64C is not to be taken lightly. I then decided to try something, which I think (according to a few Google searches) haven’t been done before – to attach a cooling system to the backplate.
Corsair Carbide 400R has a nice feature: two characteristic bulges on either side of the case. On the left-hand side, that would allow you to put an oversized heat sink on your CPU. On the right-hand side it leaves quite a lot of empty space between the motherboard surface and the case wall.

I had two old heat sinks, which served in its time on a Pentium III machine. I also had a low profile fan, though I don’t remember whence it came from. After some measuring (important!), sawing, lapping and screw fastening, I had the following construction:


This construction got permanently glued to the central part of the backplate using Arctic Alumina Thermal Adhesive. (That’s why measuring beforehand is vitally important – the keyword here is “permanently”).

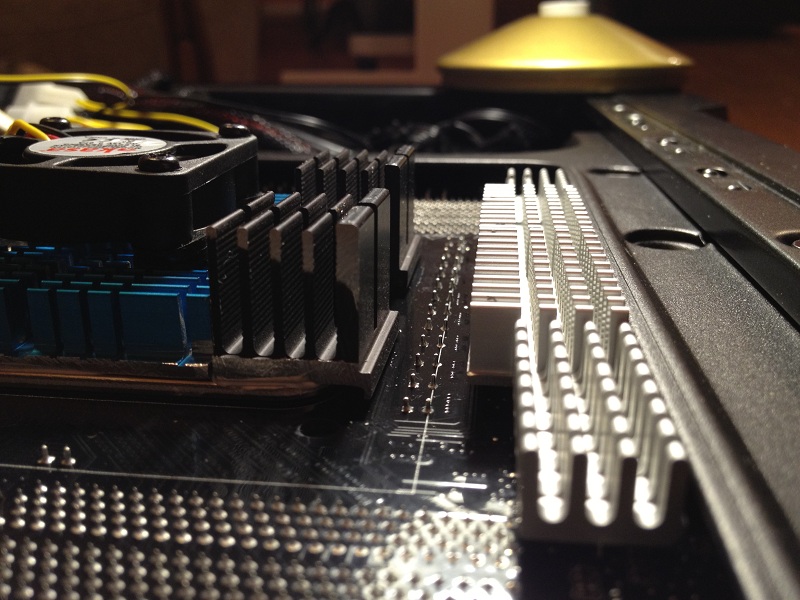
Finally I cut two appropriately-sized bits from a larger heat sink, lapped them as well and attached them to the upper part of the backplate, so that they partially overhang the motherboard. The upper part is where the most heat was generated, so adding those two heat sink bits was intended to even out the odds. The final working assembly looks like this:

I’ve configured the fan to pull the air from the heat sink. even though I have high air pressure within the case and dust filters on all 4 intake fans, there is bound to be some minute dust particles left in the air stream. By pulling the air from the motherboard, I ensure some air circulation around the heat sinks, while avoiding bombarding the back of the motherboard with the aforementioned dust particles. The fan is also connected through two Noctua speed reducers, so the fan is not audible, while still pulling a significant amount of air.
So, did all this hassle pay off? Oh, yes. The socket temperature went down by 14 degrees to 50C and the average core temperature went down by 6 degrees to 67.
I have ultimately overclocked the CPU to 4.3GHz (VCore 1.310V) and under the heaviest load of Prime95, the socket now warms to 57C with the core averaging 71C. With everyday loads (like running SMP build of Folding@Home) the temperatures stay within 55C / 68C.
If you decide to do anything like this with your system, make sure that you do thorough measurements and that the heat sink (with an optional fan) will fit under the case cover. And remember that the adhesive is PERMANENT. 😉
UPDATE: I have newly gone all-out and added passive cooling to the power regulator backplate, which was also running too hot. This required some sawing and lapping of the heatsink set, sold by Akasa. I also changed the fan over the CPU backplate as the old one started making noises (those small fans don’t last long – maximum a couple of months). That’s how it looks now:

I also had problems with heat on my rig, specially with the socket temperature, that was raising up to 84 C, while my cores where being at somewhat safe (with water) avg 62 C and max 63 C. I also happened to notice that my back plate was too hot to be touched, while tress-testing. So I went to Google and typed “backplate cooling” and found this site on the results. Inspired by your success, I tried making a similar modification to my current rig and gained good results, even thought I went lazy and used no sinks. My ingredients were:
Phenom 1100T x6 @ 4ghz
Asus A5M97
Corsair H100
Antec P280 (a case with much room behind the board)
Ambient temperature: 21 C
So basically I just screwed some old motherboard spacers with washers, on the mounting screws pointing out of the back plate, and fastened a 40 mm fan on those with eight small cable ties. I just plugged the fan on the 5v rail. No permanent thermal greases or sinks for me…. 😉
And the results on tress-testing where -9C (Max) on the motherboard sensor and -4C (Max) on the cores. On the average the results where even better getting -6C on cores and -13C on motherboard sensor. This practically puts me way back to safe temperatures range for my phenom, with core 59 C (max) and socket 75 C (max). Also meaning that I don’t need to worry about the coming of the summer anymore.
In normal use, like gaming, the results are way less dramatic getting only like 1-3 C and 1-8 C differences depending on use. But everything counts, specially if you can do it, with old computer parts and cable ties…. 😉
Pingback: Motherboard Backplates - Hardware Canucks
AS5 isn’t the best compound to use and will have a reasonable effect on temps (if your willing to go this far and push-pull)
http://cdn.overclock.net/d/da/900x900px-LL-daff382e_Screenshot2013-02-07at11.43.19PM.jpeg
I know the chart is from 2011 but nothing really better has come out since the top slot in that link.
I don’t understand why you only put 4 heatsinks and such a small fan. Don’t you regret having put 6 of them (as far as I see, 6 would have fit perfectly) and a twice as big fan? The results would have been so much better
Do you mean the heatsink in the CPU backplate? Not really. I later removed the fan for quieter operation and didn’t notice much temp difference. As for the 4 heatsinks – they are actually 2, cut in half. I worked with the materials that I had at hand. 😉